Google maps as background for SVG map
Google maps as background for SVG map
In the previous article, I showed a simple example of creating svg card and I want to continue this topic.
Why do we still need Google maps and why not use a picture instead of extra scripts?
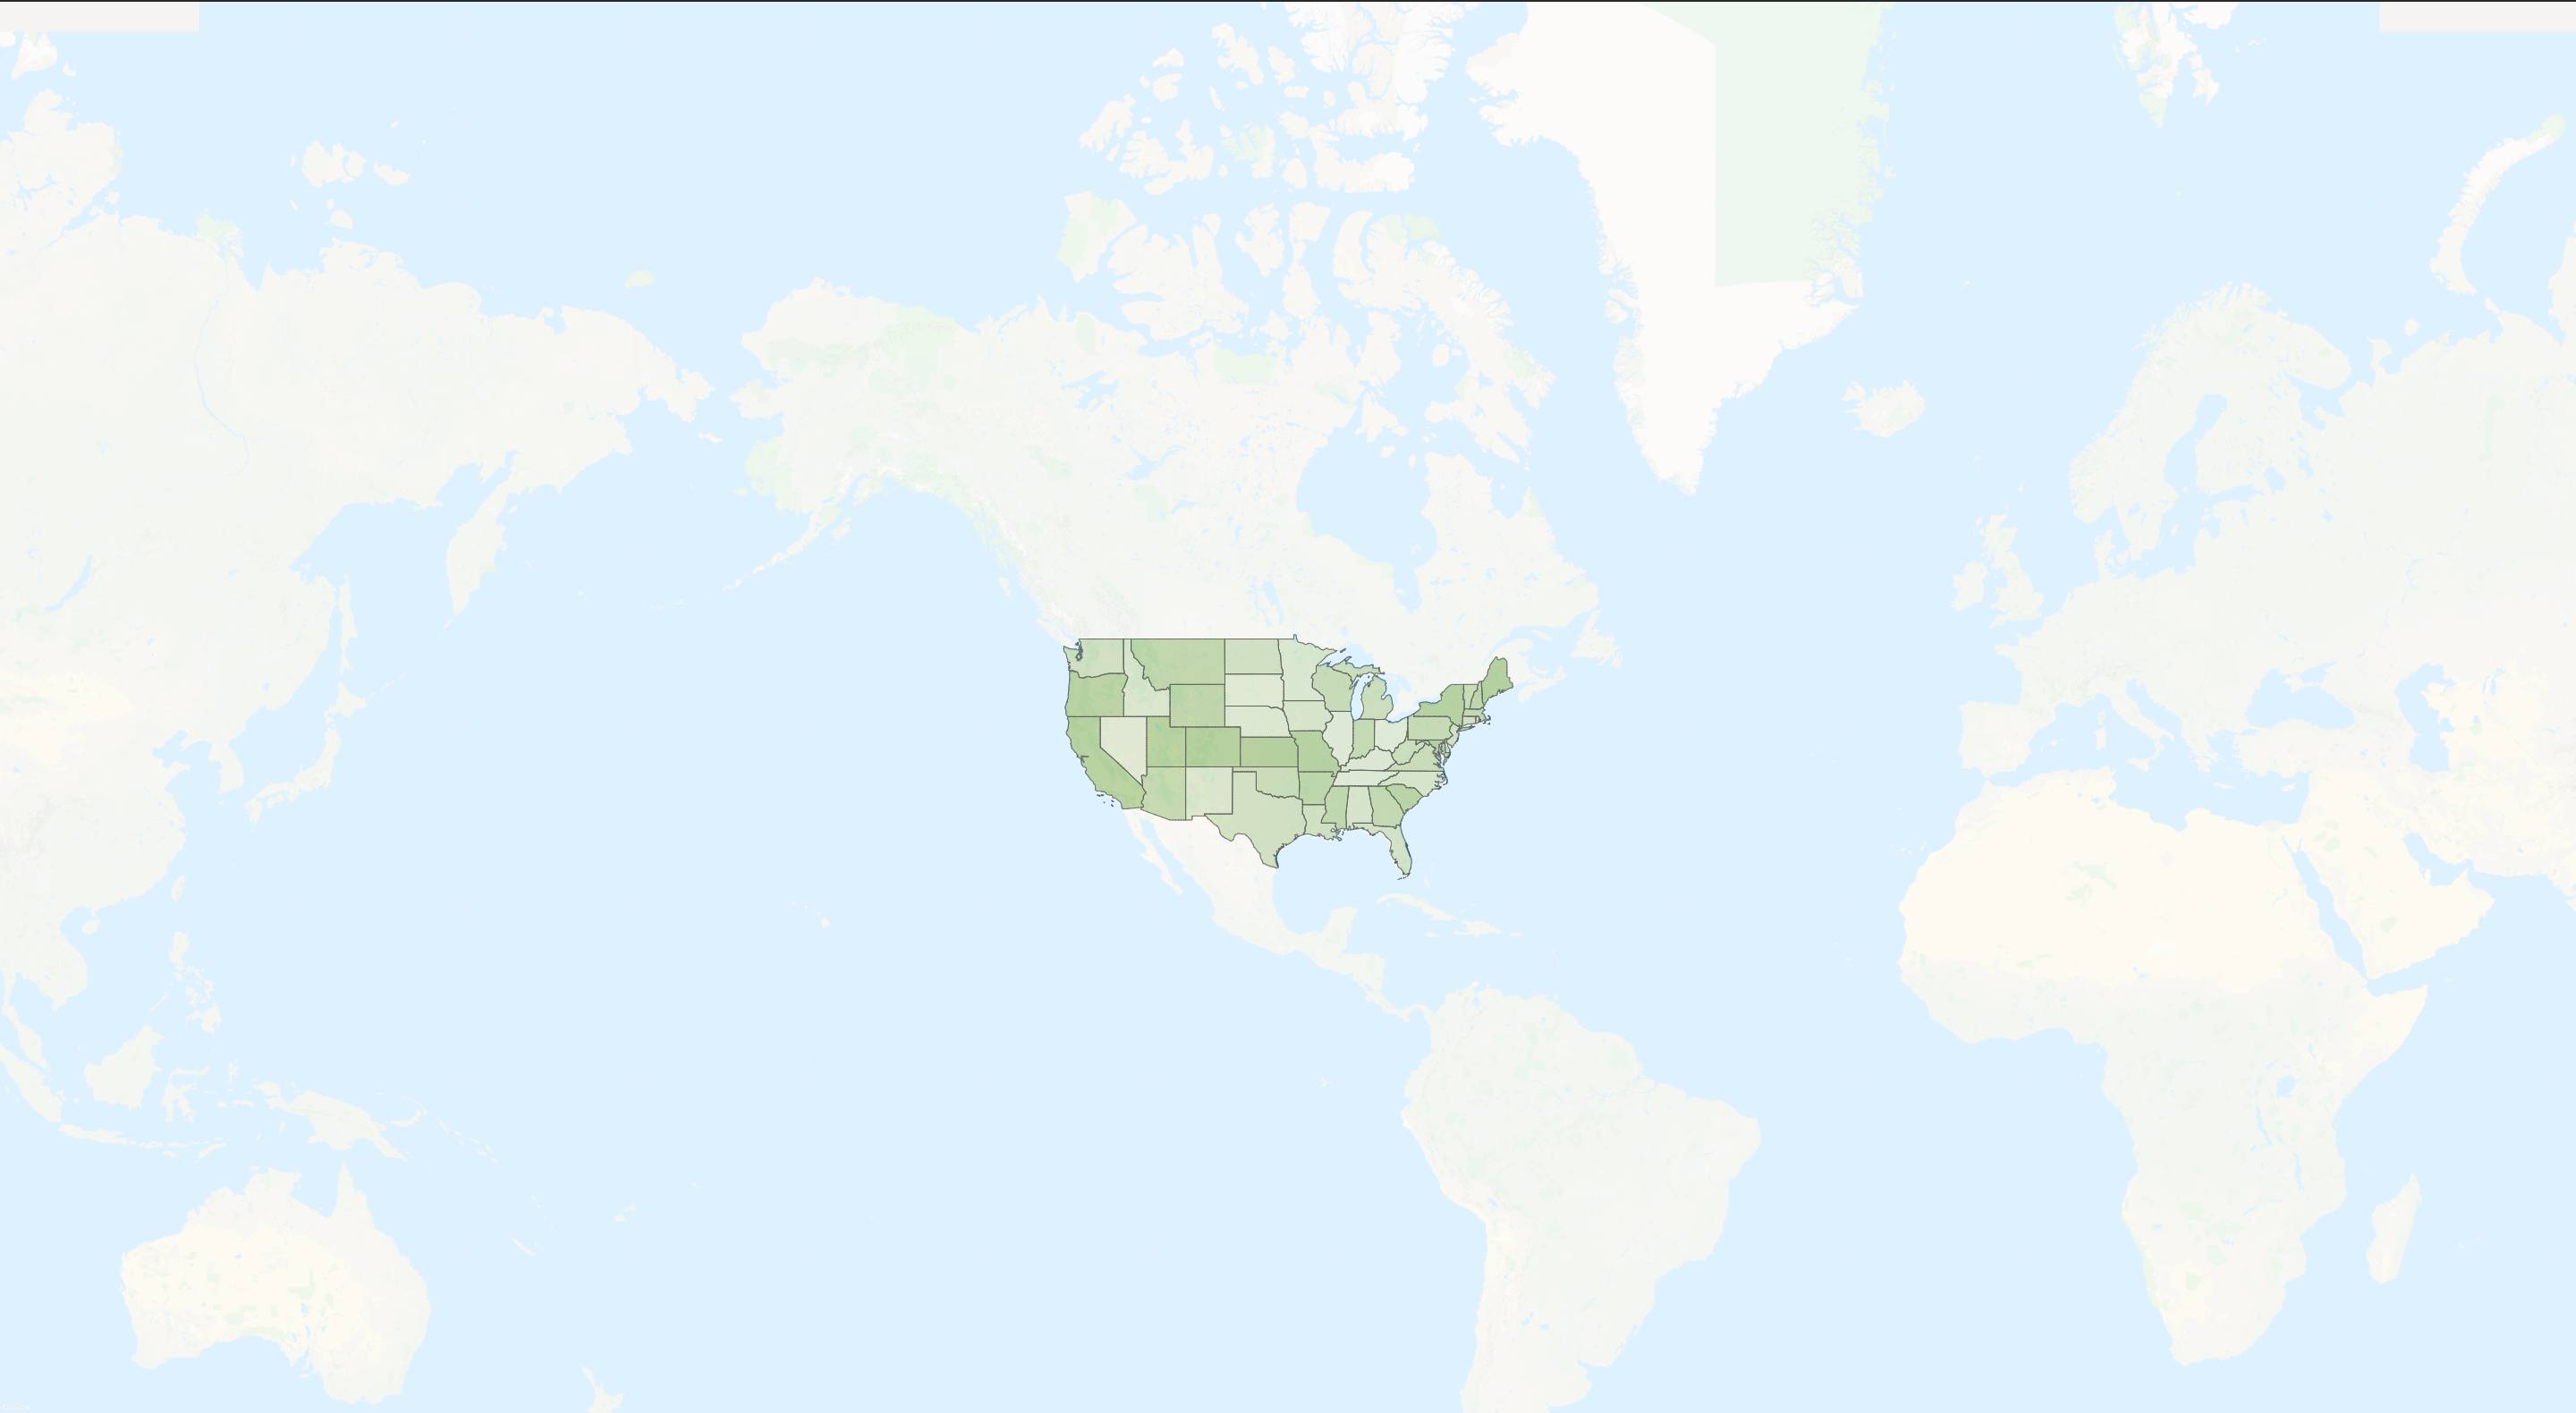
Imagine that we want to show USA with a beautiful background of the oceans and neighboring continents.All we need are just find a picture, set as background and done. It seems that everything is beautiful and we do not need Google maps, but there is a big BUT, there is responsive layout, and here there is a problem with scaling the background, Google map will help to rid off this problem.
Let's start our work by creating a universal Google maps component that can be used not only for background purposes.
What is the Google Maps API and how to access the API?
The Google Maps API is a very cool and convenient thing that is easy to use and understand, it’s a geolocation service. Using this service, we can display the map and places on the map. You can get the API key on the here. After receiving the key, add the google maps API connection script to the main file of our project.
<script src="https://maps.googleapis.com/maps/api/js?key=[YOUR API KEY]»></script>
[YOUR API KEY] - must be replaced by your Google Maps API key which will give you access to the global google object that we use to create the map.
BaseGoogleMap Component
props: {
  locations: [Array, Object],
  address: String,
  zoom: {
    default: 11,
    type: Number,
  },
  markerPosition: Object,
  label: String,
  markerImg: String,
  disableDefaultUI: {
    default: false,
    type: Boolean,
  },
  mapCenter: Object,
  customStyled: Array,
  customControl: Object,

},
There are the basic props necessary for us, everything you need is with a description on the site. Most of them are understandable without a description, but such as disableDefaultUI, customControl and customStyled - I will describe below.
- disableDefaultUI - allows you to completely disable the default user interface API settings. This property disables any automatic user interface behavior in the JavaScript Maps API.
- customControl - we need it to disable zoom and the ability to move the map.
- customStyled - is another important props that will allow you to add custom styles for the map, as an example, change the type of map, hide the names of cities and all other signs.
The next step is our basic methods for initializing the map
methods: {
  createMap() {
    this.map = new this.googleMapClass.maps.Map(this.$el, {
      disableDefaultUI: this.disableDefaultUI,
      center: this.mapCenter,
      ...this.customControl,
    });
  },
  initGeocoder() {
    const geocoder = new this.googleMapClass.maps.Geocoder();
    geocoder.geocode({ address: this.address }, (results, status) => {
      if (status !== 'OK' || !results[0]) {
        throw new Error(status);
      }
      this.map.setZoom(this.zoom);
      if (this.customStyled) this.map.set('styles', this.customStyled);
    });
  },
  initLocations() {
    if (this.locations) {
      this.locations
        .map((location) => {
          const marker = new this.googleMapClass.maps.Marker({
            ...location, label: this.label, map: this.map, icon: this.markerImg,
          });
          marker.setPosition(this.markerPosition);
          return marker;
        });
    }
  },
  initMap() {
    this.createMap();
    this.initGeocoder();
    this.initLocations();
  },
},
There is no sense in describing all of them : everything is already clear. Only the initMap() method in which we put all the functions together is needed to initialize the map on the site that needs to be run on mounted.
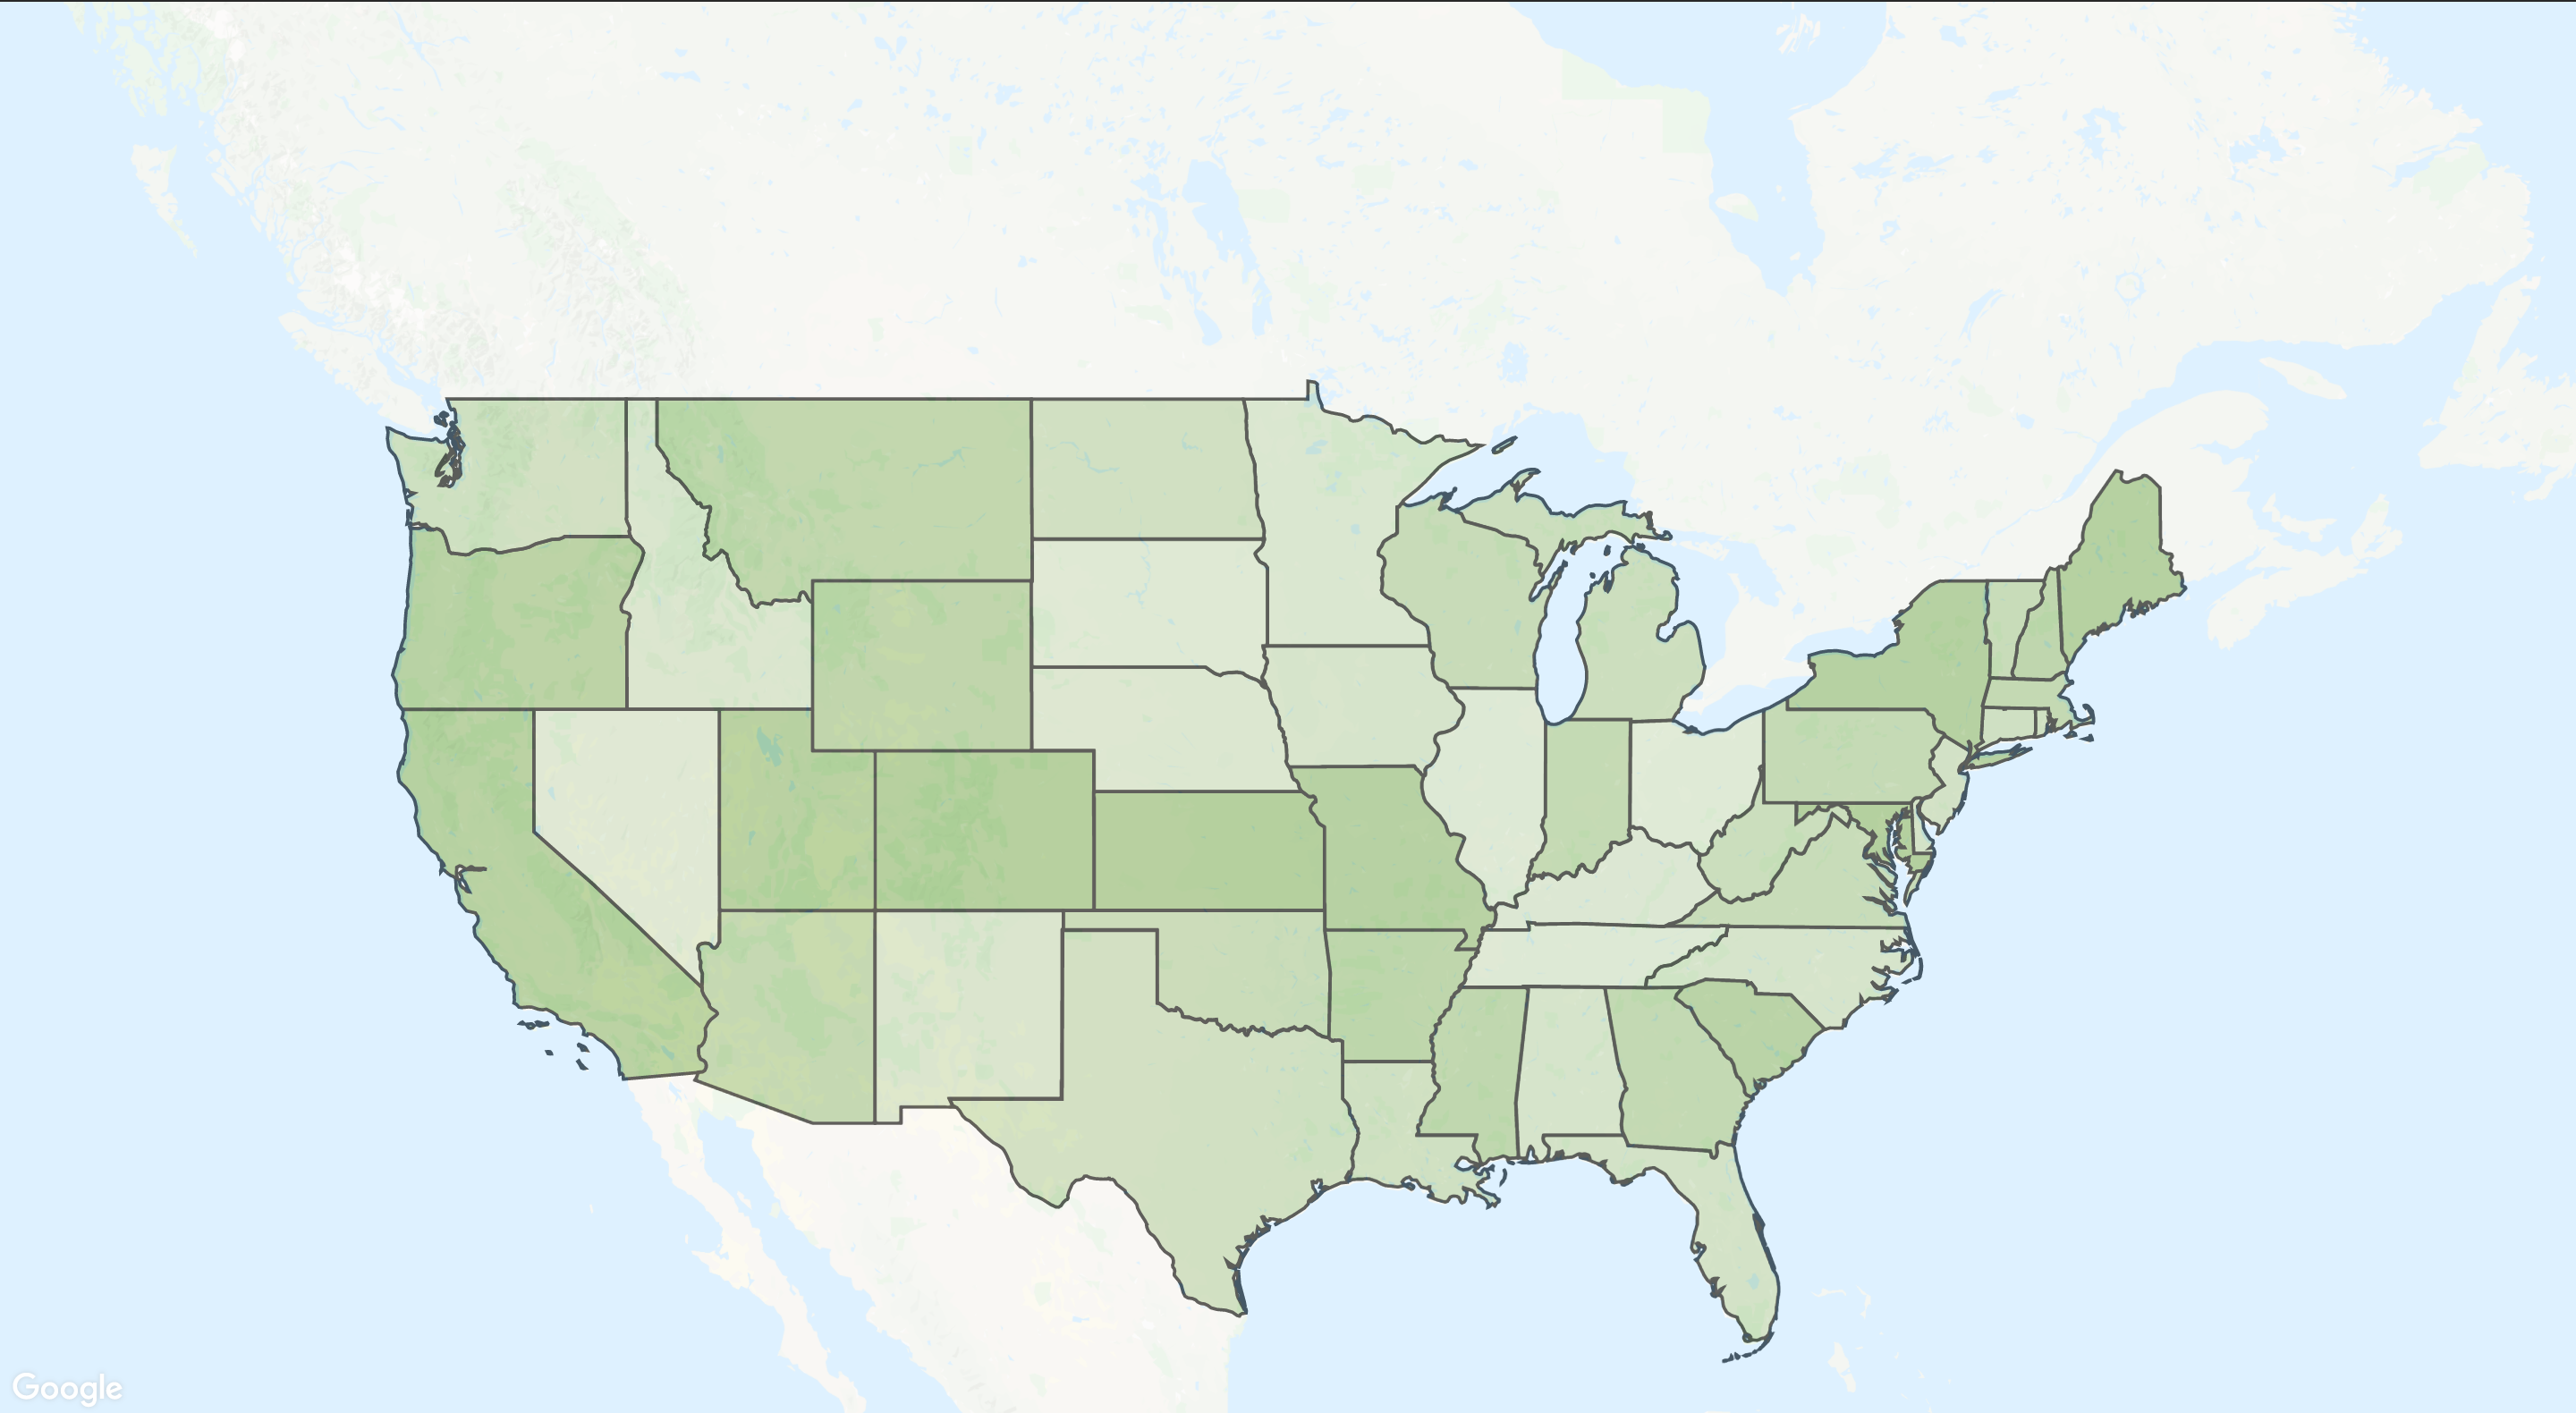
Svg Map and BaseGoogleMap components together.
<template lang="pug">
  .page
    .header-map-bg
      BaseGoogleMap(
        :address="mapOptions.address",
        :mapCenter="mapOptions.position",
        :zoom="mapOptions.zoom",
        disableDefaultUI,
        :customStyled="mapOptions.mapStyle"
        :customControl="mapOptions.control"
      )
    .map-wrap
      SvgMap
</template>

<script>
import BaseGoogleMap from 'Components/V/VGoogleMap';
import SvgMap from 'Components/SvgMap/SvgMap';

export default {
  name: 'Page',
  components: {
    SvgMap,
    BaseGoogleMap,
  },
  computed: {
    mapOptions() {
      return {
        address: 'USA',
        position: {
          lat: 43.0061518,
          lng: -95.8483994,
        },
        zoom: 4.61,
        mapStyle: [
          {
            featureType: 'all',
            elementType: 'labels',
            stylers: [
              { visibility: 'off' },
            ],
          },
          {
            featureType: 'road',
            stylers: [
              { visibility: 'off' },
            ],
          },
          {
            featureType: 'administrative',
            elementType: 'geometry.stroke',
            stylers: [
              { visibility: 'off' },
            ],
          },
        ],
        control: {
          zoomControl: false,
          gestureHandling: 'none',
        },
      };
    },
  },
};
</script>
The main properties of mapOptions are mapStyle, position and control.
- position - for this example, I took Google maps to center the coordinates;
- mapStyle - is an important point to turn off the names of cities, roads, and the entire state markup;
- control - to disable the ability to zoom in or out the map.
And the last important point for the background map is the styles.
.header-map-bg
  width: 100%
  height: 100%
  position: absolute
  left: 0
  top: 0
  z-index: 2
  opacity: 0.4
  pointer-events: none
Result
Summary
The main goal of the example is to show a simple and effective way to combine a svg card and a scalable background. Perhaps this is not the easiest example, and a lot of people can simply use the picture as a background, but if you think about responsive layout then do not try to not beat the picture with large screens. Ultimately, the map will look perfect at any scale.